Training your dog starts with knowing the most important basic behaviors to teach him. Here’s why “stay”, “come”, “leave it” and “heel” top the list.
When training your dog, how do you know the most important things to teach him? This article will look at the top four basic behaviors every dog should know – stay, come, leave it, and heel – and why they’re so crucial.
Sounds straightforward, doesn’t it? Easy-peasy. But as with everything else in life, things aren’t always as simple they seem, which is partly what this article is all about. Words mean different things to different people, and to their dogs. For example, you’ll notice I use the word “behaviors”, not “commands”. Because of my background, the word “command” implies some kind of tyrannical dictator issuing an edict with a clear understanding that, if the edict isn’t followed, dire consequences will ensue!
When I first started training over 40 years ago, that’s exactly what would happen; and the dire consequences would include the use of choke chains, pinning dogs to the ground, threatening them with yelled “NOs”, and all that other garbage. But in positive, reward-based, force-free training, which many trainers including myself switched to in the 1980s, there are no threats. Only signals.
Here are the top four basic behaviors I suggest every adopter teach their dog(s) to do.
- Stay
- Come (recall) and emergency recall
- Leave it
- Heeling and walk-without-pulling
For emergencies and safety, I suggest taking your dog to a PhD-like level of behavioral reliability, called stimulus control, for these basic behaviors.
What stimulus control means:
- The dog understands the cue and responds immediately.
- The dog doesn’t perform the behavior in the absence of the cue.
- The dog doesn’t do the behavior in response to some other cue.
- The dog doesn’t do some other behavior in response to the cue.
1. Stay
Teaching a dog to stay in position is one of the most important basic behaviors to teach your dog.
That being said, many trainers teach two similar concepts with slightly different meanings. One signal is “stay” and another is “wait”.
The difference between the two often has to do with the degree of rigidity or formality. When “wait” is used, it’s kind of like saying “hold on a minute”. “Stay” really means “freeze in that particular position”.
Some trainers use “wait” in situations involving boundaries, such as in the case of a dog waiting to get out of a car or go through a door. Other trainers use “wait” as a form of “leave it”. For example, if a dog is going for food on a table or running to greet someone at the door, the trainer might use “wait”, followed by a release or another signal to do something else instead.
To add to the confusion, some trainers don’t use “stay” or “wait” at all. They teach that once a dog is asked to sit, lie down or stand still, there’s a strict implication that he is to stay in that position until released. There is no follow-up signal of “stay” or “wait”.
All these are perfectly fine as long as your communication to the dog is clear. They all work. It’s just a matter of starting at your dog’s learning baseline and progressing towards reliability, gradually adding the three D’s – Duration, Distance and Distractions. Depending on a number of factors, reliability usually takes two to 12 months, and sometimes longer.
For me, “stay” means to stay in position, whether the dog is standing, sitting or lying down. The critical thing to remember is that whatever you choose to do, there must be a beginning and an end. I tell clients: “If you ever say ‘stay’ you have to say ‘okay’.” In other words, no matter what word you use, you must remember to release your dog. Your release word(s) can be “okay”, “find it”, “come”, “you’re free” or “that’ll do”. Just remember to always release.
Here’s a classic example of why dogs get confused. People don’t want their dogs following them when they leave the house, and often say “stay” so their dogs don’t run out the door. Once the door is shut, the dog looks around and essentially says to himself: “Well, there’s nobody around, so I’m getting up.” Then people don’t understand why their dogs won’t stay when asked.
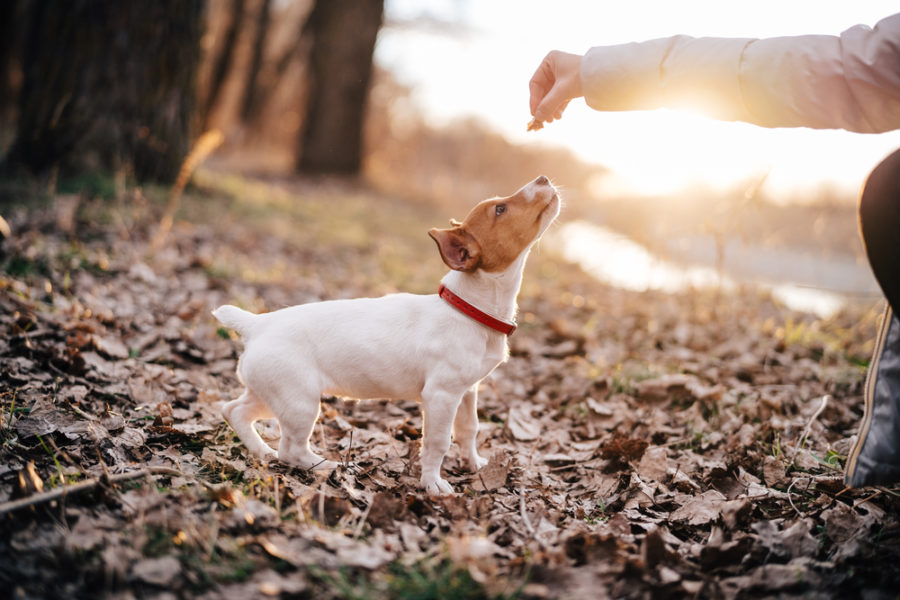
2. Recall, aka come-when-called
A reliable recall can be life-saving if your dog gets loose and starts running towards a skunk or the street. You can teach a PhD-level recall, and many positive trainers teach excellent techniques on YouTube. And here’s my method to help get you on your way, not only with “come-when-called”, but also with “stay” and “leave it”(we’ll go more into “leave it” in the next issue): vimeo.com/subliminallabs/review/116614259/87dcefb4d9.
However, it has been my experience that most people simply don’t spend the time going through all these steps, so I also teach an emergency recall – see sidebar. This has more to do with classical than operant conditioning, and if done correctly, I have found it works at least 90% of the time.
Before you start, pick any word. I use “here” but you can use any word as long as it’s not something you use frequently: e.g. you might use “babaloo”, “bank”, “treat”, etc. There’s a great trainer on YouTube who teaches something a little similar using the word “bacon”. It may sound strange, but basically it’s the same training principle people have used for decades, without even knowing they were doing it. If your dog didn’t come when asked, for example, you might have gone into the kitchen and shook a box while yelling “treat!”
Teaching come-when-called
- Use $10,000 treats (chicken, turkey, hamburger, cheese, etc.).
- Say “here” (or whatever your chosen word is) and immediately stick a treat in your dog’s mouth. It’s important you’re close enough to your dog that the treat is delivered within a half a second. Don’t ask him to come and get it at this point. Be sure to say “here” before moving your hands.
- Repeat up to 50 times a day, spread throughout the day, in different areas of the house and yard, for three to five times per exercise. You’ll do this every day for the rest of your dog’s life. It’s like putting money in your savings account so it’s there for an emergency withdrawal. Note that I say “up to” 50 times a day. It’s only during the first two to three months that very frequent repetition is important; after that, it doesn’t have to mean giving your dog 50 treats every day forevermore. As time goes by, a few times a day is all that’s necessary.
- Do not test this method for 60 days. At the 60-day mark, while your dog is in the midst of playing or eating, stand six to 20 feet away and say “here”. He should turn like a zombie and come running to you. If he doesn’t respond, do not repeat the word. It simply means those neural pathways haven’t “grown” enough. Wait another 30 days and try again. Here’s a video clip to help you out: originaldogwhisperer.com/animalwellness.
In the next issue (Apr-May 2017), we’ll cover the basic behaviors of “leave it” and polite walking (heeling and walk-without-pulling). Stay tuned!
3. “Leave it”
Teaching a rock-solid, bombproof “leave it” is one of the most – if not the most – important basic behaviors you can teach your dog. “Leave it” means “Do not approach, touch or eat whatever it is you’re sniffing or looking at.” This includes everything from spilled medication to skunks, snakes, horse poop, and much more.
A reliable “leave it” can be life-saving. Recently, my friend Kelly was watching television with her dog Hunter when Hunter suddenly lifted her head and stared intently across the room. Kelly noticed Hunter’s frozen gaze and got up to investigate. She saw something move and found that a scorpion had somehow found its way into the house. Hunter had been taught to “leave it” so she stayed put. Kelly dealt with the intruder and all was well. It could have been a very different scenario – including painful stings and an emergency trip to the vet – if Hunter hadn’t been trained.
There are several step-by-step methods you can use to shape a reliable “leave it” (detailed videos can be viewed at originaldogwhisperer.com). Just as with other basic behaviors, you would start in a non-distracting environment and gradually progress, over time, to more and more reliability. Of course all methods are force-free and reward-based. And there is no such thing as 100% reliability with any dog…or human! So the key to keeping everyone safe is always using good old common sense, a watchful eye and maintaining the safest environment possible with prevention and management.
As you’ll see in the videos, the methodology for teaching “leave it” is the same for all basic behaviors:
- Teach the behavior.
- Label the behavior.
- Gradually add distractions including other objects and greater distances, and for longer periods of time.
For example, Hunter was first taught to leave a stationary piece of chicken, then to leave a piece of chicken that was dropped or thrown. She was then taught to walk around food without touching it, and then to leave other objects like glasses, the TV remote, a stuffed toy like a skunk, stuffed animals in motion (by tying a string to it and making it move), and so on until the behavior became generalized.
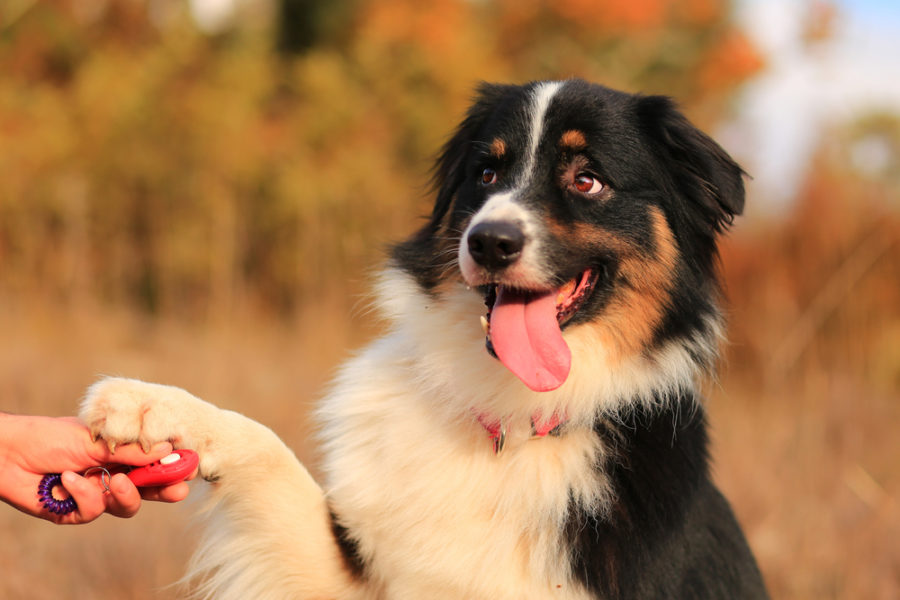
4. Heel (and loose-leash walking)
Loose-leash walking has two components:
- Formal heeling, which means having your dog in a window of space by your side next to you.
- Less formal loose-leash walking, where your dog can be in front of or behind you, but without a taut leash.
Heeling is used in situations where more control is necessary and your dog knows to pay strict attention to you. This can include when you’re walking in public, like on city sidewalks, while walking across the street, while walking past a house where dogs are barking behind a fence, or at any time your dog seems nervous.
I use two methods to teach a dog to heel.
Method 1: “There you are!” Sometimes also known as free or spontaneous heeling
- To start, get a bunch of $10,000 treats like chicken, cheese, etc.
- Practice in the house and/or a fenced-in yard.
- Have your dog off leash or use a 20’ leash for added safety.
Simply start meandering around the yard (or your living room if it’s big enough) and pay no attention to your dog. To make it fun, I start singing while I meander. Your dog will eventually come up to you. The moment he is by your side, enthusiastically exclaim “there you are!” and quickly stick a treat in his mouth. If you’re using a clicker, you would click the moment he’s by your side, and treat.
Then meander away and do the same thing. As soon as your dog catches up to you and is again by your side, repeat the “there you are!” and treat.
As you continue, you’ll see your dog hanging out by your side for longer periods. When this happens, continue to praise and treat, but gradually increase the intervals between treats. This is a great foundation for the next step, which is teaching and labeling the behavior.
Method 2: Structured heeling
Before we begin, I strongly recommend walking dogs on a harness rather than connecting the leash to the collar. For dogs who are really strong pullers, I recommend using an anti-pulling, front-ring harness, designed to give you more control and help avoid any unintentional jerks on your dog’s neck.
That being said, I also strongly recommend attaching a secondary clip that connects from the collar to the harness. This does two things: it keeps the harness in place on the chest and is an added protection in case the harness gets loose and the dog backs out of it.
Step one
Have your dog by your side in a non-distracting environment. With your hands on your chest, say “heel”, and using the hand closest to your dog, stick a treat in her mouth. Do not walk forward while you do this. Stay in place and repeat five to ten times.
Step two
You’ll soon see your dog looking up at you, anticipating a treat. At this point, begin to walk and treat at the same time. As you walk, say “heel” and simultaneously put a treat in your dog’s mouth as before. Bring your hand back to your chest each time. Walk ten to 20 steps.
Step three
With your dog by your side, keep your hands on your chest, say “heel” once, and begin walking. Take four or five steps, continually praising your dog, then stop and say “sit”. When your dog sits, enthusiastically praise and treat her.
Begin again, and each time gradually add more steps before stopping and asking your dog to sit. Remember, you’re not continuously saying “heel” and treating, you’re only using praise.
If you practice this heeling exercise and add the distance of one house-length each day, you’ll be around the block in a month or two with your dog remaining in position. Then it’s just a matter of gradually adding more and more distractions, turns, changes in speed, and so on.
But here’s the secret: the heeling exercise is just like the stay exercise in that it’s important to have a clear beginning and end to the behavior. So you might start by saying “ready”, practice the heeling exercise for a few minutes, then release with “okay!” or “you’re free!” Then repeat later in the day.
One of the easiest ways to wean your dog off training treats is to finish the exercise by giving your dog a “life reward”, like the freedom to go sniff a tree or, if you’re in a secure field, throwing a ball or allowing her to say hello to someone or another dog.
Walk without pulling
Walk without pulling means just what it says. While the dog is on a leash, he can go ahead of you, behind you, or to your side – but he immediately returns to you the instant he feels the slightest tension on the leash. To teach your dog to walk without pulling, we use a combination of three methods. They all work fine by themselves but your progress can be greatly enhanced if you use all of them. They are all powerful communications that say to you dog: “Stay by my side (or close to it) without pulling, and you’ll be forever free to walk with me wherever I go.”
1. The start/stop method
Have you ever see a dog straining on his leash, pulling his human along behind him? The person has inadvertently taught the dog that the freedom to go forward is actually a reward for pulling. This is the exact opposite of what you want your dog to do. You want to teach him that the freedom to move forward is a reward for keeping a slack leash. Whenever your dog pulls, creating a taut leash, stop in your tracks. Your dog will sniff for a while and eventually wonder what’s going on. When he turns his head to look at you, you’ll feel the leash slacken and the muscle tension decrease. Start walking forward again.
This gives him the freedom to explore again. Now your dog is learning that a taut leash (muscle tension) means stop and a loose leash (relaxed tension) means go.
Note that there’s a critical juncture you must be aware of to make this method work. Within the first ten-minute session, your dog will figure it out and you have to be aware of his recognition. Here’s what will happen. Let’s say you’ve done a dozen or so stop-and-gos. There will now come a point where your dog will back up or relax his shoulders as soon as he feels the leash go taut. This will happen so fast you won’t have a chance to come to a complete stop. This is the critical point at which you effusively praise and treat your dog. Why? Because he has just figured out that he can keep you moving if he backs up a little, so his action stops the pressure. That’s the whole point of the method. He thinks it’s his idea.
If you don’t acknowledge the split second this happens, he’ll say, “Well, now I’m confused,” and go back to pulling. This is a tactile, not a visual signal. I tell students to close their eyes and walk a few steps so they can feel the loosening tension rather that look for it.
2. The “wait for me” method
Using the first method, you continued to walk while the leash was loose. But you may also find that your dog stays in place and waits for you to catch up. If that happens, you can give him an additional reward for being close to you.
To explain, let’s say you are practicing the start/stop method. The leash goes taut, and you immediately stop. When the leash tension slackens, because your dog turns her head to look at you, you praise her and immediately start walking again. (Tight means stop; loose means go.) But let’s say that instead of pulling again when you begin walking, your dog waits for you to catch up. Now she’s by your side. When that happens, you immediately praise and treat her for being in that position. She will quickly learn that she can not only keep you walking as long as she keeps the leash loose ; she will also figure out that if she’s by your side, she’ll get an additional bonus of food treats. It’s very similar to the spontaneous heeling method.
To summarize, you’ll be practicing the start/stop method but adding rewards if your dog waits for you to catch up.
3. The reversal method
You’ll again practice the start/stop method but will add another twist. Say your dog stops to sniff something and you walk ahead. As he catches up to you, and before he can pass you, quickly lure him with a treat and turn around and walk the other way. Once again he’ll be by your side so immediately release the treat. As you walk, if he stays in heel position, continue to praise and treat him.
This method works because dogs really don’t like to retrace familiar ground as much as they like to explore new territory. He learns he can keep you going forward if he doesn’t walk ahead of you. He also learns that he intermittently gets treats if he stays by your side.